この記事では、Arduinoで測定した温度をパソコンで表示する方法をソースコード付きで解説します。
気温を表示
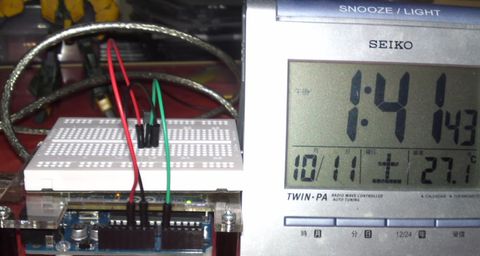
Arduinoマイコンと温度センサ(LM35DZ)を用いて気温(温度)を計測し、その結果をシリアル通信でPCに転送してPythonでリアルタイム表示してみました。
回路構成(配線図)
Arduinoと電子部品の構成・配線は下記の通りです。
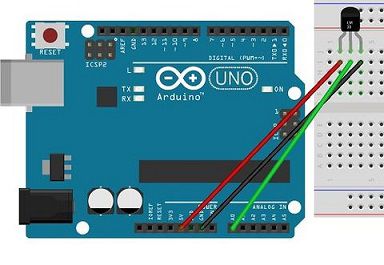
電子部品
・Arduino UNO (1個)
・温度センサ(LM35DZ)
・ジャンプワイヤー(数本)
ソースコード
サンプルプログラムのソースコードです。
Arduino側
float a_in;          // アナログ入力値(0〜203)
float temp_c = 0;  // 摂氏値( ℃ )

void setup(){
  Serial.begin(9600);  // シリアル通信速度
}

void loop(){
  // アナログピンから計測値を取得(0〜203)
  a_in = analogRead(0);
  // 入力値を摂氏に換算
  temp_c = ((5 * a_in) / 1024) * 100;
  // 改行しながら出力
  Serial.println( temp_c );
  // 1000ms待機
  delay(1000);
}
Python(パソコン側)
# -*- coding: utf-8 -*-
import numpy as np
import serial
import datetime

def queue(src, a):
    dst = np.roll(src, -1)
    dst[-1] = a
    return dst

def main():
    # 1次元配列の生成
    temps = np.zeros(10)
    i = 0
    ser = serial.Serial("COM5")  # Arduinoが接続されているコムポートを指定

    while(i != 100):
        todaydetail = datetime.datetime.today()
        line = ser.readline()   # 行終端まで読み込む
        temp = line.rstrip()    # 行終端コード削除
        # キュー操作
        temps = queue(temps, temp)
        print('--------------------------------')
        print(todaydetail.strftime("%Y/%m/%d %H:%M:%S"))
        print("Temp:", temp)
        print("Average:", np.average(temps))
        print("Std:", np.std(temps))
        i+=1

    ser.close()
    print("End")

if __name__ == '__main__':
    main()
実行結果
サンプルプログラムの実行結果です。

コメント